Welcome to techytweaks..

Welcome to techytweaks. Hope you enjoy.

TechZone on techytweaks.

Get updated with the Latest Tech-Tweeks with techytweaks.

Need any Support/Help?

Need help? Got a thing for us?

Follow us!

Follow us on Social Networking sites...

Now follow techytweaks via Mobile!

Enjoy the mobile version of techytweaks now! Stay updated!

ADVT

Get rid of Windows 10 Updates forever

Windows Updates can be very annoying.
First, let us take a look why people may want to turn off Windows updates.
With Windows 8.1 and earlier versions, we had Windows Update giving us options to:
  1. Install updates automatically (Recommended)
  2. Download Updates but choose when to install them
  3. Check for updates but let me choose whether to download and install them
  4. Never check for updates (Not Recommended)
These options provided a way to defer updates until we had enough time to download and install them or to have them downloaded automatically and then install them at a time we wish. 


Microsoft has explained that it will provide updates in two distinct methods for its two distinct types of clients.
First are the home users who will not have the option to defer upgrades. The updates will download and install even if they are working on something, making the computer slow in some cases. The PC however would restart only if you are not doing anything or it would restart at the scheduled time, if you have etone. Where a reboot would be required, the user might have to save his or her work and then reboot before going back to the work he or she was doing. Of course, Windows 10 will let you defer restart, but that is not enough because a download in background might slow down your browsing in some cases.
The other ring of users are the enterprise users who will have the option to delay updates, so that they can hold it to the time when they are free. Microsoft said it will push updates to such users less frequently, so that they are faced with a minimum down time. These are the corporates and real-time users such as hospitals and ATMs etc.
Coming back to Home users and Professional users, there is not even the option to delay the updates. They will be downloaded as soon as they are available. Availability of Windows Updates for normal users means that the updates have already been tested by Windows Insiders. If you are a Windows Insider, running Windows 10 Home or Pro, you will be in first priority to receive updates. After few days of you testing the updates and if it doesn’t pose any problems, it will be released to the normal ring of users.
Thus, you are stuck. Windows 10 will keep on downloading updates as soon as they are available and will occupy your computer resources, when you may not want it too. Some of us will want to keep the automatic downloads to be stopped so that we can install the updates manually when free – when we are not working on something urgent. That is to say, some users would want the liberty and option to download and install updates when they want and not when Microsoft provides it.

We won't make you wait again,Now lets move on to the procedure for blocking windows update!
  • Goto :Control Panel > Administrative Tools, you can access Services
  • In the Services window, scroll down to Windows Update and turn off the process. To turn it off, right-click on the process, click on Properties and select Disabled. That will take care of Windows Updates not being installed on your machine.

Bonus: If you are already see 'Install Updates and Shutdown' on your shutdown menu, You can delete these downloaded updates by following the steps below:
  • Go to This PC and open the partition you have your Windows installed on (it’s usually C:)
  • Go to Windows folder
  • In Widows folder, ind folder named Softwaredistribution and open it
  • Open sub-folder Download and delete everything from it (you might need an administrator permission)

How to remove 'Recent Files' from Windows Explorer. (Win10)


It's been a long since i have posted some post-One new tweak or a small tip for users who would like to hide the 'Recent files' from windows explorer.
Microsoft recently released Windows 10. Alongside a lot of new major features, the OS update also includes a couple of tiny improvements. One of the latest addition that comes with Windows 10 is the Recent Files section on the File Explorer. While some may like this feature as it helps them quickly access their recent files, some may not like it because it could clutter their File Explorer. If you’re one of those folks who don’t like the Recent Files section in Windows 10, here’s how to remove it:
  • Open File Explorer
  • Go to the View section from the top bar
  • Click on Options
  • Look for the “Open File Explorer to” dropdown
  • Click on the drop-down and change “Quick Access” to “This PC” and click on OK
  • After that, close File Explorer and reopen it to see the change in action.
Thats all! You peeps are good to go! :D

iOS 9.3.3 Jailbreak-The complete solution.

Hello lads! As we all noticed The jailbreaking solution for iOS 9.3.x was released couple of days ago.
There are few things to take care of and also know If you are deciding to jailbreak their devices.
1.Only for 64 bit devices.(Starting from iPhone 5s)
2.It's a semi-tethered jailbreak,Meaning that you will have to hit 'jailbreak' button everytime you restart your device.(Will take only 5-8sec only.)
3.When jailbreak is done,You will be issued with a certificate for 7 days,Which will expire after 7 days obviously,So you will have to jailbreak again using PC.But,fortunately we have found out a method to make these certificates(profile) last for a year so that Peeps out there don't have to worry about jailbreaking their devices every week. :)

So,Lets get started.

Download-IPA File
Size:10.45 MB / Version:1.0 / MD5:fe77f02db26b9d3d142ee1f343a6fdbb / SHA1:ab334937cd7bb7077eac25b223bd3784e8dcd7b7
Preparation:
1. Pangu jailbreak IPA file NvwaStone_1.0.ipa available at http://pangu.io .
2. Cydia impactor available at http://www.cydiaimpactor.com/ .
(Special Note: This tool, developed by Saurik, is used to sign the ipa file so that Pangu jailbreak tool can be executed on iOS devices. Cydia impactors does not collect your apple id and password. All the information is only used for applying a personal free certificate from Apple.)
3. A computer (Cydia impactor runs on all major OSes, including Windows, OS X, and Linux)
4. A valid Apple ID. (In case that you do not want to use your current Apple ID to apply the personal certificate for any reason, we suggest you apply a new Apple ID and use it)
Limitations:
1. An Apple ID can only apply for a certificate for a limited number of devices.
2. The certificate will expire in 7 days. If your certificate gets expired, you need to follow the guide to install the jailbreak IPA again.
To Apple Developers:
If you have enrolled the Apple developer membership, signing the IPA file with your own developer certification is a better choice (i.e., Pangu jailbreak app will get expired in 1 year, rather than 7 days).
Jailbreak guide:
1. Unzip the Cydia impactor file and run it.
2. Connect your iOS device to your computer and trust the computer on your iOS device.
3. Drag NvwaStone_1.0.ipa into Cydia impactor app.

4. Click OK button to continue.

5. Input you email address( it’s your apple id)

6. Input your apple ID password.

7. Cydia impactor will automatically prepare everything based on your inputs and sign the IPA file. If everything is OK, the IPA file should be installed in your iOS device correctly. If you get error notifications, you probably input incorrect Apple ID or password.
8. On your device, Tap Settings > General > Device Management. You then see a profile for the developer under your “apple ID” heading. Tap the profile to establish trust for this developer. (An Internet connection is required to verify the app developer's certificate when establishing trust.)
9. On your device, find Pangu App and run it.
10. Click the "start" button to jailbreak your device.


ONCE YOU HAVE JAILBROKEN YOUR DEVICE,FOLLOW THE STEPS BELOW TO GET THE 1 YEAR PROFILE.(CERTIFICATE).

How to get the 1-year enterprise certificate

If you’re ready to arm your jailbroken iOS 9.3.3 device with an enterprise certificate that will last a full 365 days, then you’ll need to follow the steps below:
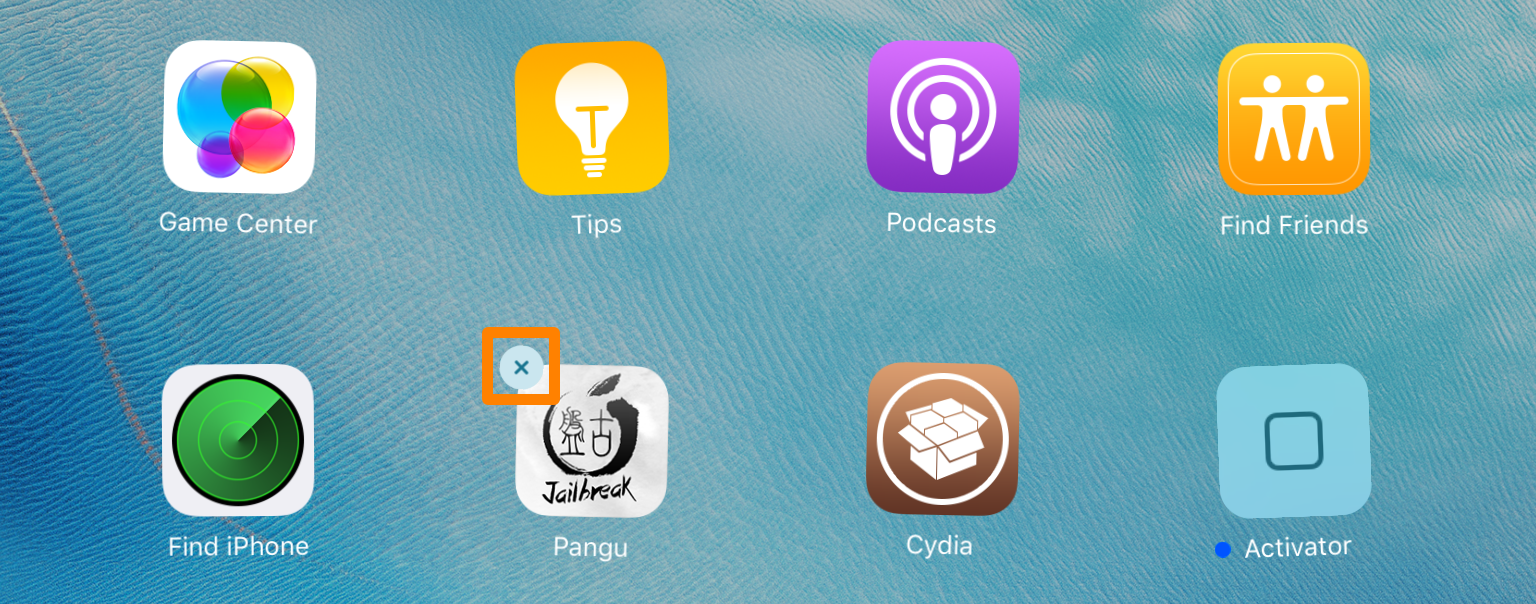
1) On your jailbroken iOS 9.3.3 device, Delete the current jailbreak app by entering ‘jiggle’ mode and tapping the X on the icon.
Delete the current jailbreak app iOS 9.3.3
2) After the app has been deleted, you want to reboot your device to enter ‘no jailbreak mode’:
iOS Slide to Power Off
3) Once you turn it back on, enable Airplane Mode from Control Center by tapping on the Airplane Mode toggle button:
Turn on Airplane Mode
4) Next, plug your jailbroken iOS 9.3.3 device into your Windows computer with a MFi-certified Lightning cable.
5) Download iFunbox on your computer, and also download this IPA file that was bundled with the original Chinese jailbreak tool.
6) Right click on the iFunbox installer and choose Run as Administrator.
iFunbox Run As Administrator
7) When prompted to allow the installer to run, click on the Yes button.
Allow iFunbox on your PC
8) Now choose English from the language list and click the OK button:
English then OK
9) When the installer opens, click on the Next button.
iFunbox Installer Next
10) Now, choose I accept the agreement and then click the Next button again.
Accept Agreement iFunbox Next
11) Click Next again when it designates the default installation path:
iFunbox Install Path Next
12) And once again, click Next after leaving the Start Menu folder alone:
Start Menu Folder iFunbox Next
13) Now click on the Install button that appears:
iFunbox Install
14) After all those next buttons, the iFunbox app will finally start installing on your computer. Just be patient:
iFunbox Installing Progress Bar
15) You will now be prompted to Run iFunbox (make sure to check the box if it’s not already), and then click on the Finish button.
Finish iFunbox Installation and Run the App
16) The iFunbox app will now open on your computer. Make sure to open the Manage App Data tab, and then click on the Install App (*.ipa) button.
iFunbox Install App IPA
17) Select the IPA file you downloaded earlier, and then click on the Save button.
Select IPA File and Save
18) iFunbox will now begin installing the jailbreak app on your device:
iFunbox Installing Pangu IPA
19) When you see this screen, it’s finished:
Pangu App All Done iFunbox
20) Now if you look on your iOS device’s Home screen, you should see the PP/Pangu jailbreak app:
PP Pangu Jailbreak App Home Screen
Note: All of our old jailbreak tweaks and apps are still on the device. They will continue to work after we finish this tutorial.
21) You can now disable Airplane Mode via Control Center.
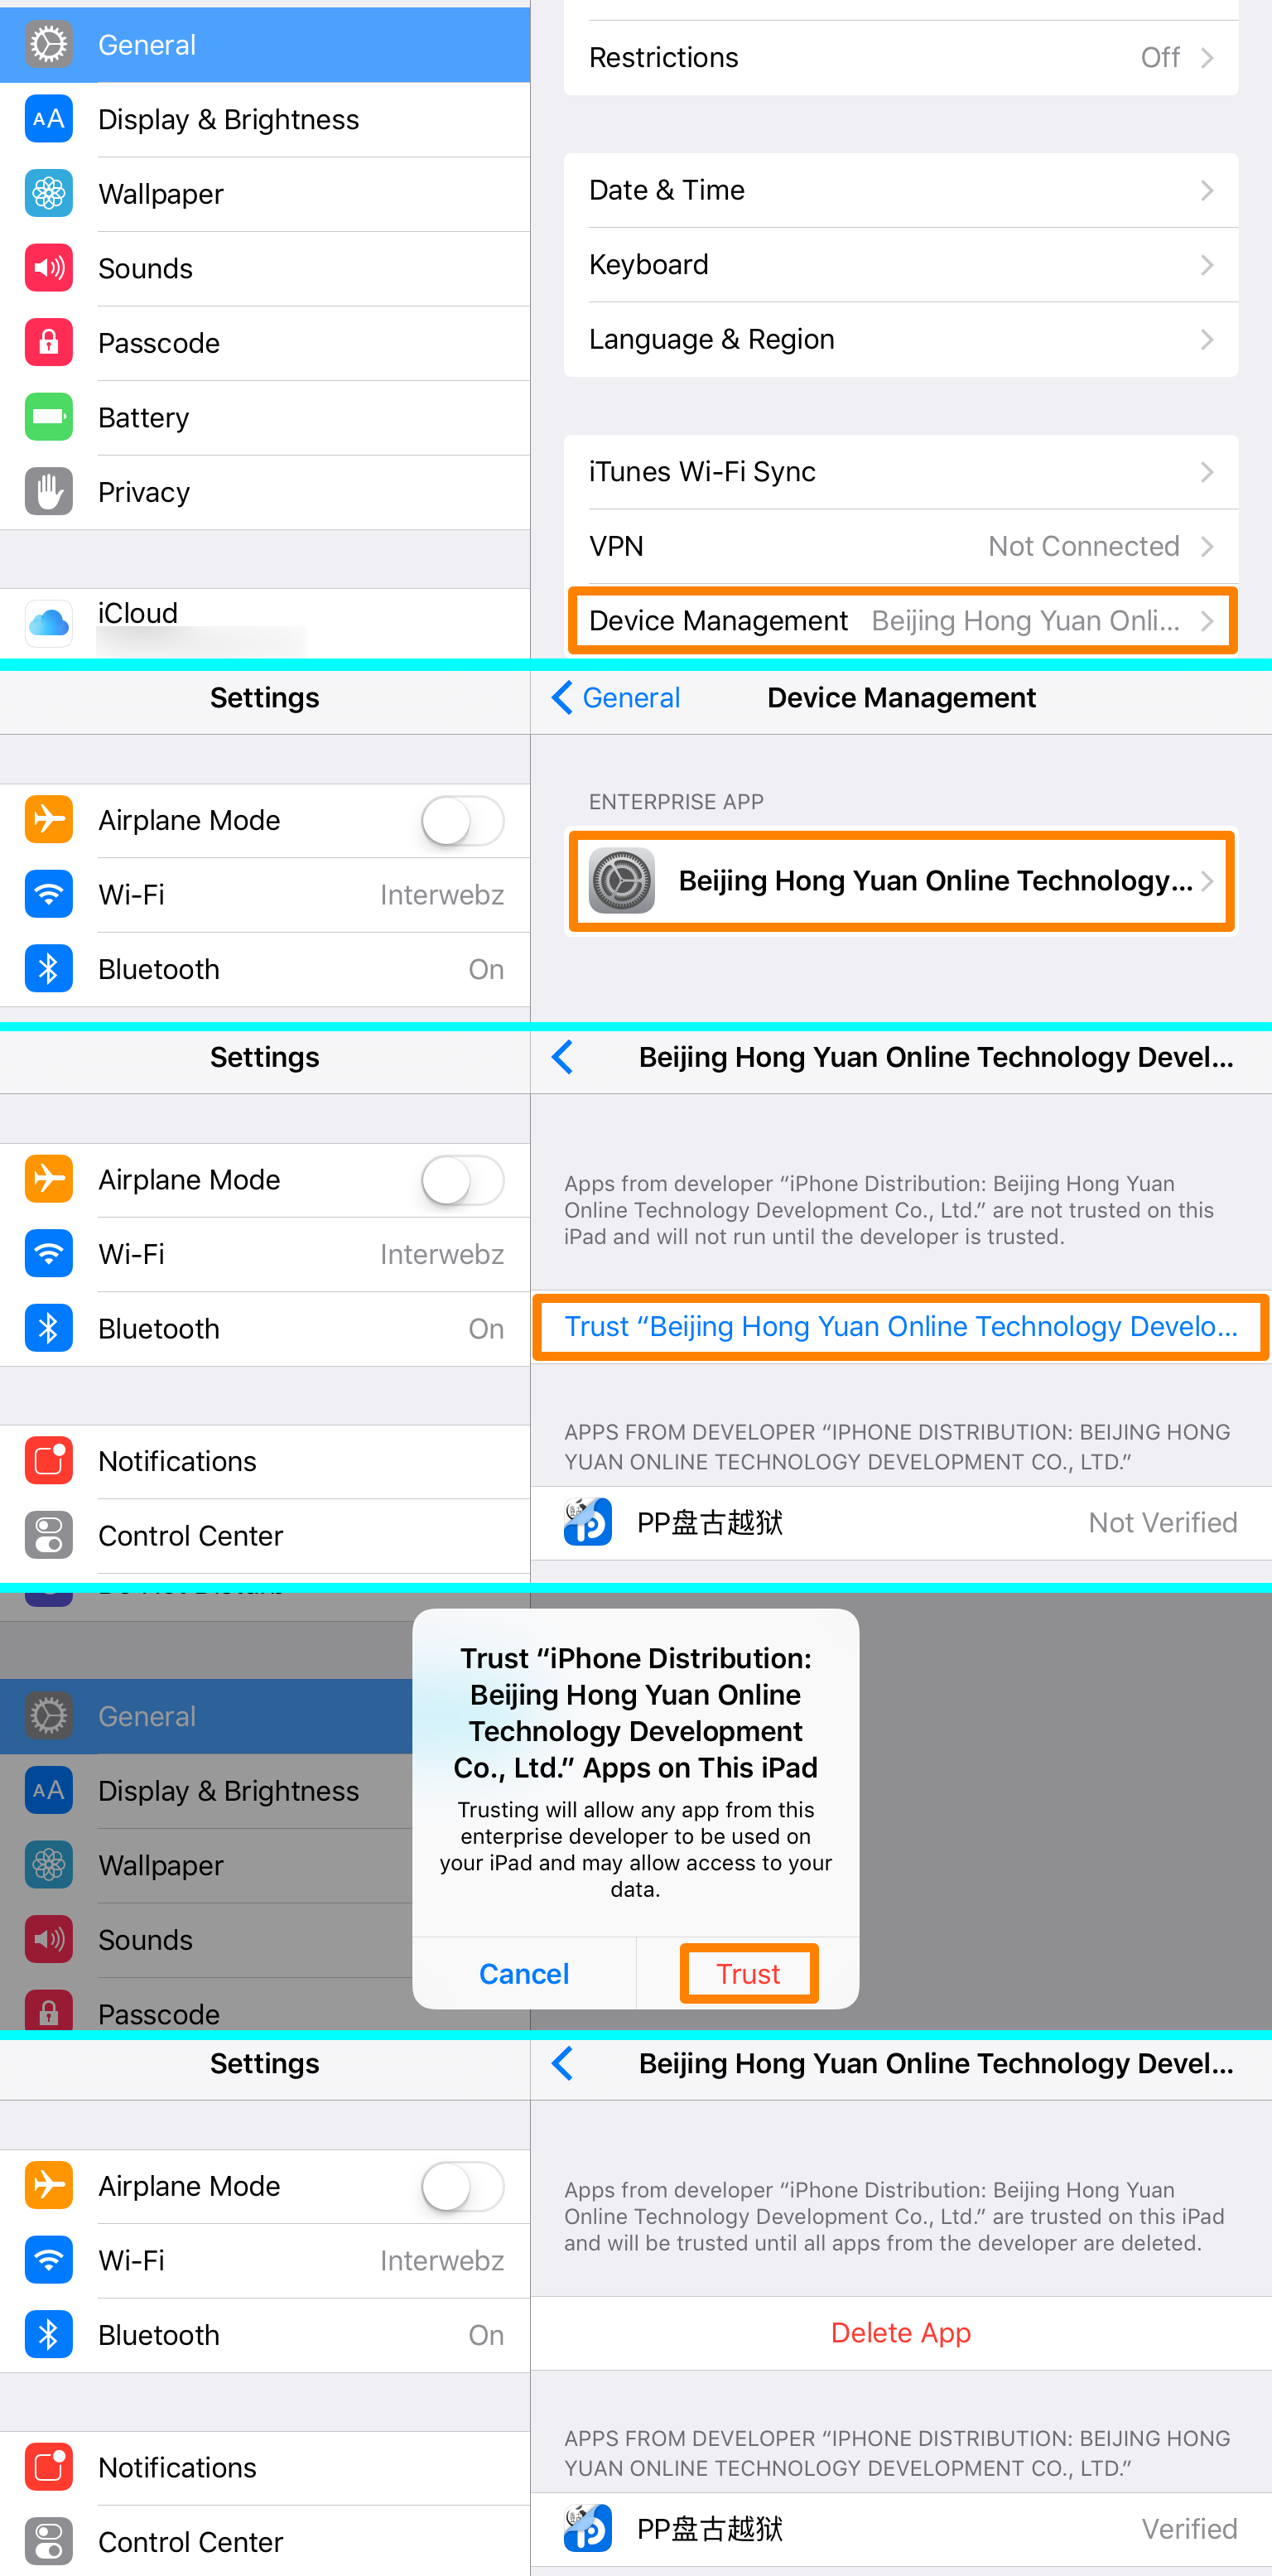
22) Open the Settings app and navigate to General > Device Management.
Trust Beijing Enterprise Certificate iOS 9.3.3
23) Tap on the Beijing enterprise certificate, and then tap on the blue Trust button.
24) In the pop-up that appears, tap on the red Trust button. The enterprise certificate is now trusted on your device.
Note: Now that the enterprise certificate is installed and trusted on your device, all that’s left to do is boot your semi-untethered jailbreak into a jailbroken state.
25) Next, go to your Home screen and tap on the PP/Pangu jailbreak app to open it.
Launch PP app Home Screen
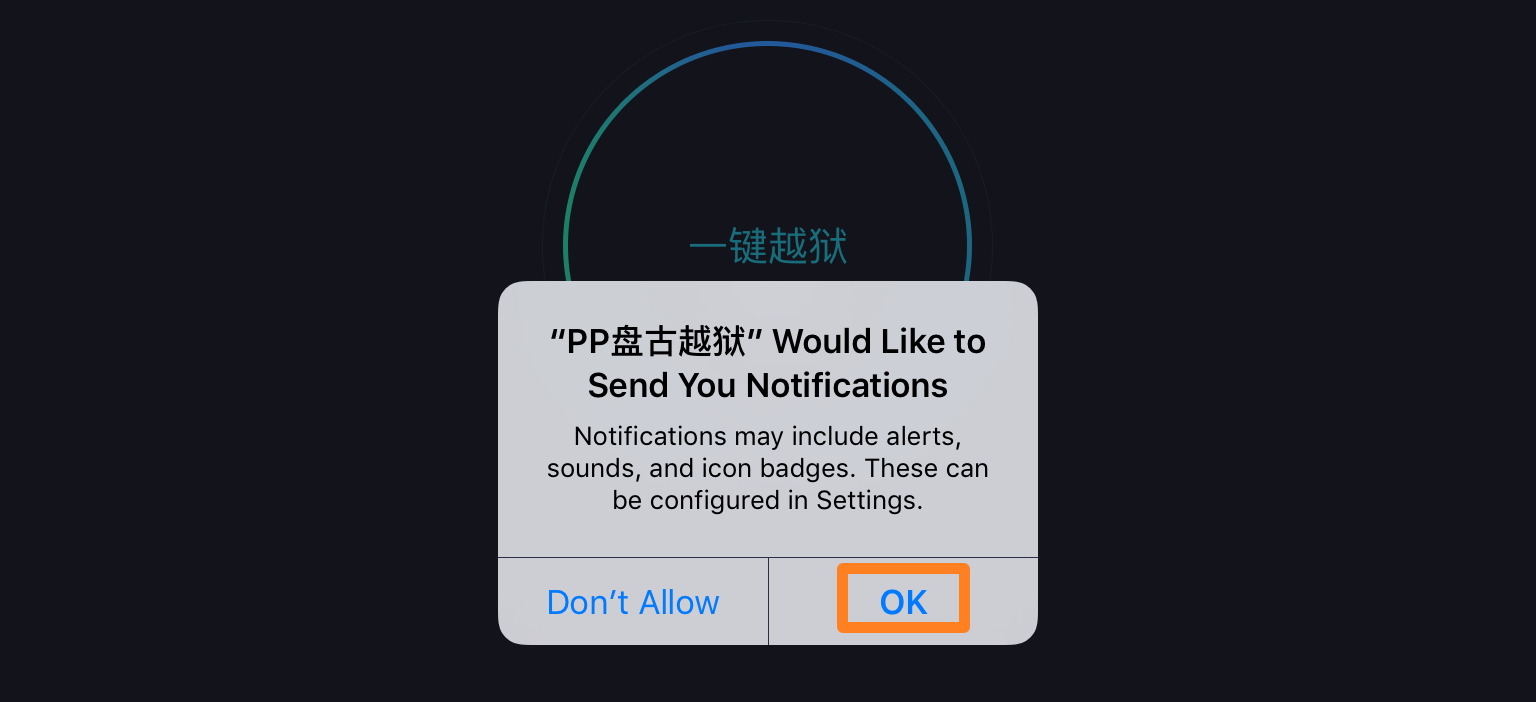
26) When prompted to enable Push notifications, tap on the blue OK button.
PP Pangu App Notifications
27) Tap on the circle in the app, and it will turn into text.
PP Pangu app tap on circle
28) Press the sleep button on your device to lock it. Shortly after, you should see a storage full notification, and a notification from the jailbreak app.
Cydia Installing Push Notification
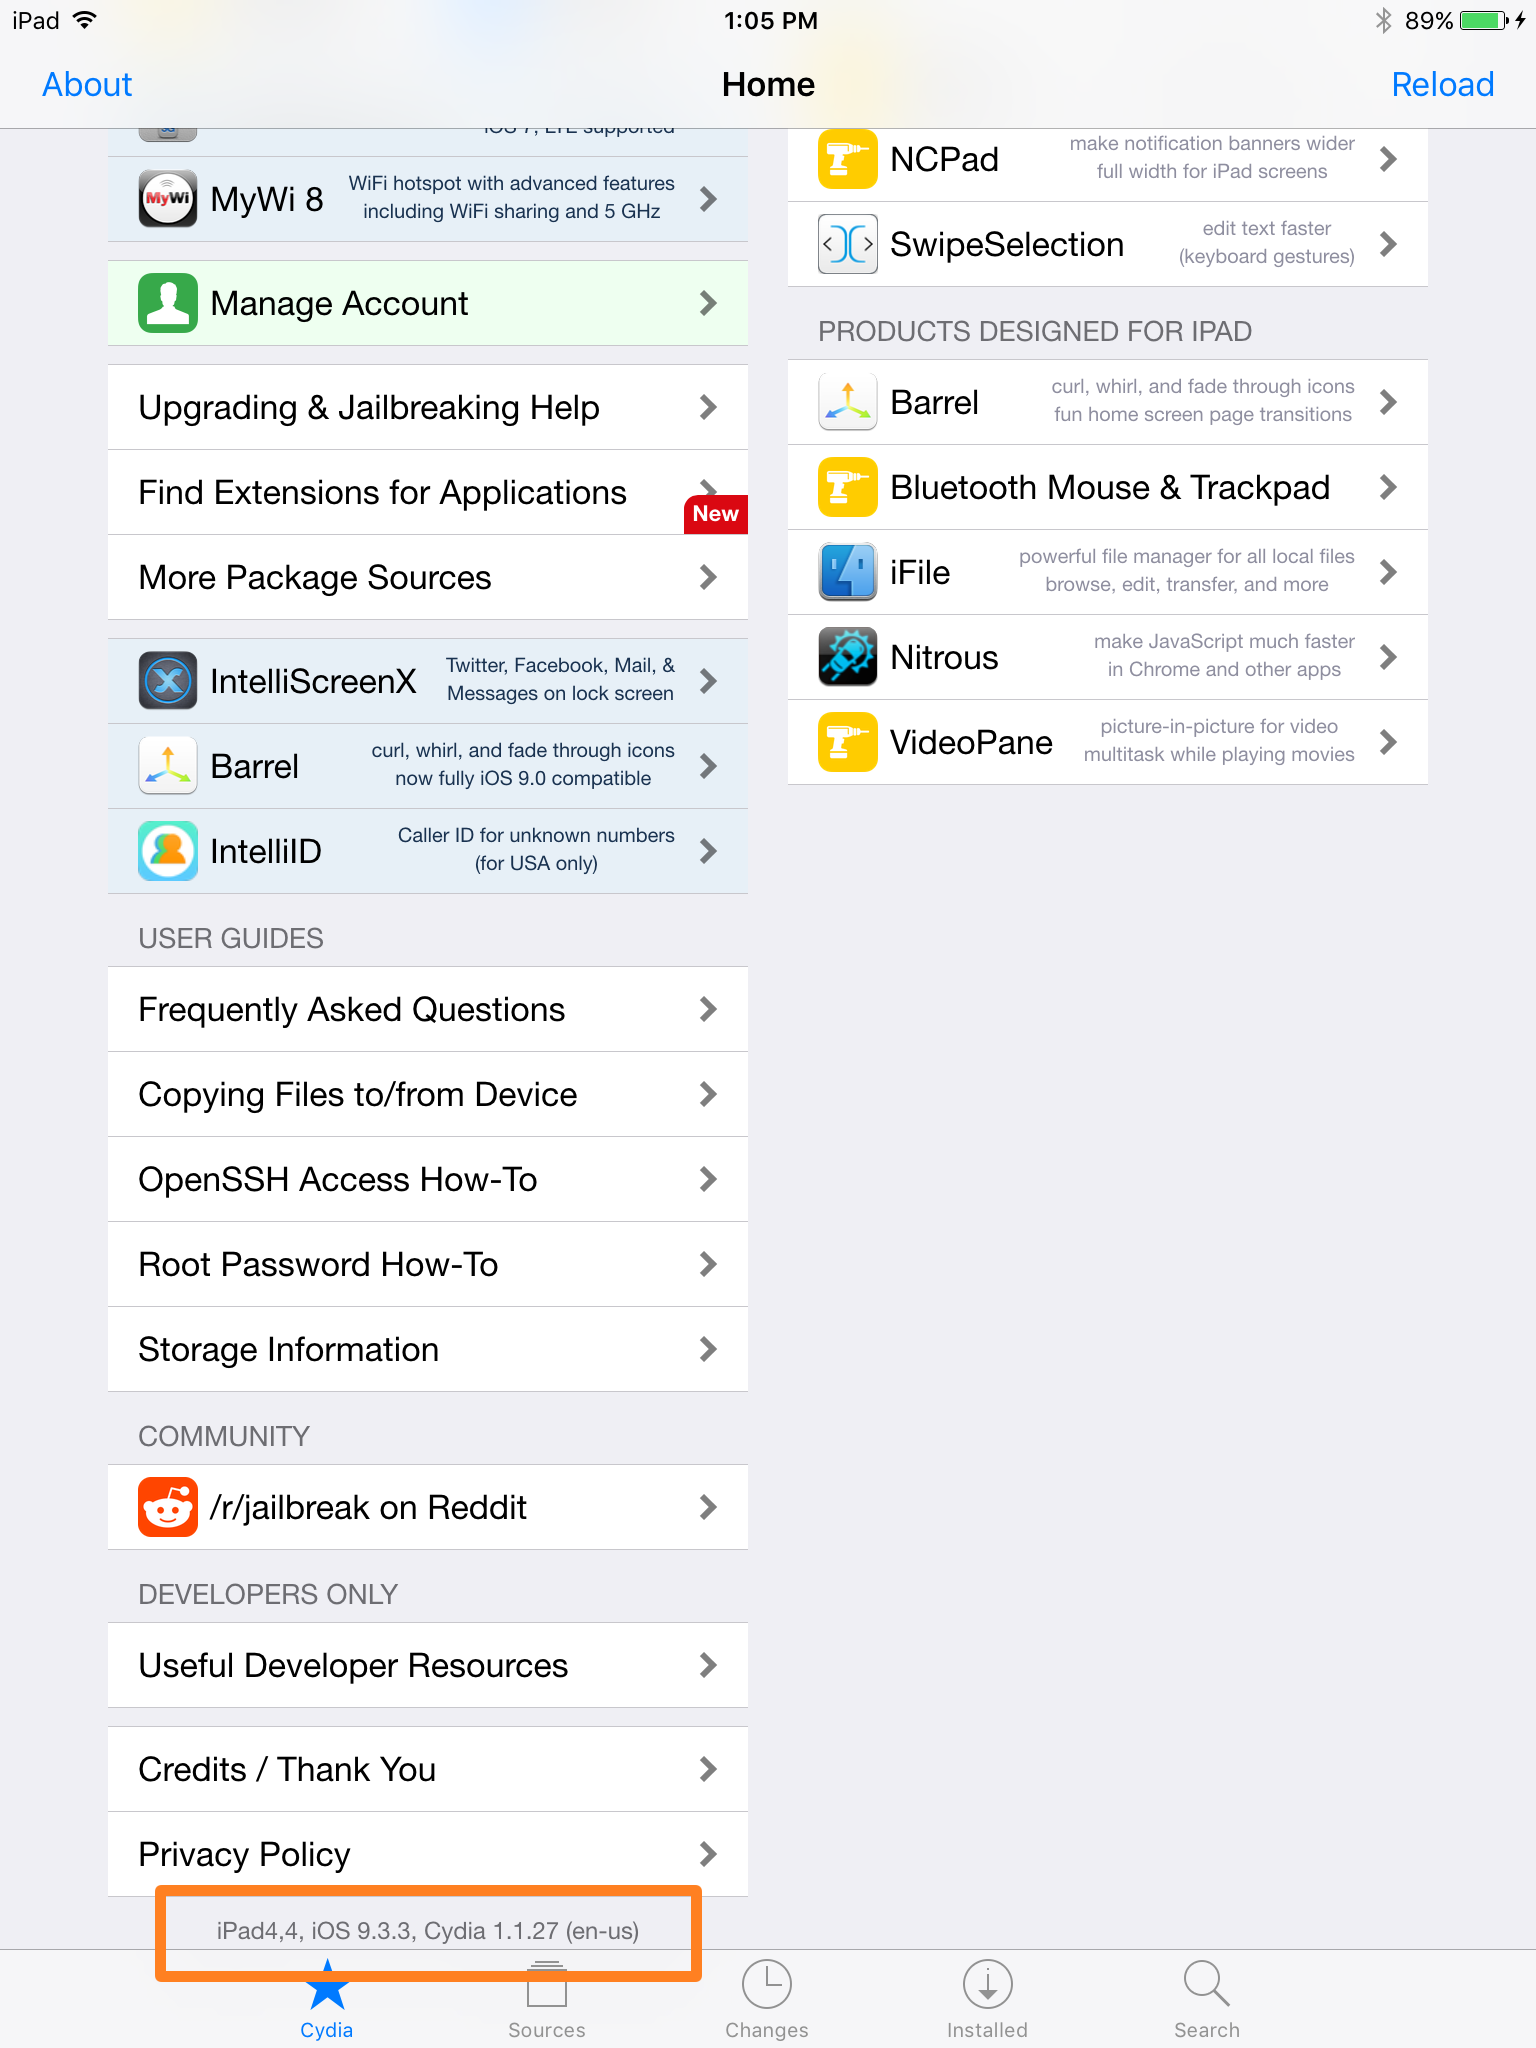
29) Continue to wait, and your device should respring. When it does, you can launch Cydia from your Home screen again:
Cydia iOS 9.3.3 iPad mini 2 Pangu
Congratulations! You’ve just installed the 365-day enterprise certificate on your jailbroken iOS 9.3.3 device.
You are good to go now.Thanks for reading the post :)
Here are some great and handy jailbreak tweaks:
Activator,Battery life,Bio protect,Initialized,Instand touchID,Linktunes,Speed intensifier,Zeppelin.

Li-Fi - Changes the whole wireless networking technology


Wi-Fi is finally moving out of the research labs to the real world environments. This super-fast alternative to Wi-Fi has been tested in a commercial context by Velmenni, an Estonian startup.
In fact, Li-Fi technology is able to increase bandwidth by 100 times and recently managed to achieve 1Gbps real-world results during testing, while boasting a theoretical top speed of 224Gbps. This means that you’d be able to download 18 1.5GB movies in a single second. We’ll let that sink in. The technology isn’t affected by the the number of devices using the signal either, a massive bonus when compared to traditional Wi-Fi technology.
Li-Fi allows greater security to the data on local networks as light can not pass through walls and ensures lesser interference due to other devices. Professor Haas, the Li-Fi inventor, has said in the past, that every future LED bulb could be used to beam ultra-fast internet via Li-Fi.


It should be noted that Li-Fi might not completely replace the existing Wi-Fi technology as ripping off all the existing Wi-Fi infrastructure doesn’t seem very economical. However, it can be used to complement Wi-Fi as a parallel network.

Solve Win 10 error-"CRITICAL ERROR - Start Menu and CORTANA aren't working. W'll try to fix it the next time you login"


Windows 10 was doing great for me after i upgraded to Windows 10 Pro,I felt like this was the best Windows after Windows 7 (I personally hated Windows 8).
Until then,A day i got this error saying-"

CRITICAL ERROR - Start Menu and CORTANA aren't working. W'll try to fix it next time you login"-With an 'Sign Out' option.

Though the problem ceases after I Signout and log in again,I find it very annoying.
So finally,Today i have found the solution to this.
The solution is really simple,All you have to do this :
  • Run cmd as Admin.
  • Type in "sfc/scannow".
  • Wait for the process to get completed.
  • Repeat the command and the process 1-3 times.
  • Restart your PC.
You are good to go! Please share. :)

Touchpad gestures for Windows,Finally!


Ofcourse,Most of them will be probably using Windows 10 by now, But what most of them don't know is about the touchpad gestures which Microsoft have integrated in Windows 10 with the help of Intel.
We all know how Apple have utilized the touchpad beautifully to give users a great experience,Microsoft have now come up with similar gestures on their latest Operating system.But ofcourse,You need to have a 'Precision Touchpad' for these gestures to work.
Try out these gestures on the touchpad of your Windows 10 laptop:
  • Select an item: Tap on the touchpad.
  • Scroll: Place two fingers on the touchpad and slide horizontally or vertically.
  • Zoom in or out: Place two fingers on the touchpad and pinch in or stretch out.
  • Show more commands (similar to right-clicking): Tap the touchpad with two fingers, or press in the bottom-right corner.
  • See all open windows: Place three fingers on the touchpad and swipe them away from you.

Show the desktop: Place three fingers on the touchpad and swipe them towards yourself.
  • Switch between open windows: Place three fingers on the touchpad and swipe right or left.
  • Open Action Centre: Tap with 4 fingers.
  • Search: Tap with 3 fingers.

These gestures can be configured from within the Mouse and touchpad section of the Settings app. Each individual gesture above can be disabled if you like, although they’re all enabled by default.